Tomb
Raider The Last Revelation Walkthrough and Game Guide
Featuring All Secrets and Hidden Rewards and packed with Screenshots
Level 30: Inside Menkaure's Pyramid
|
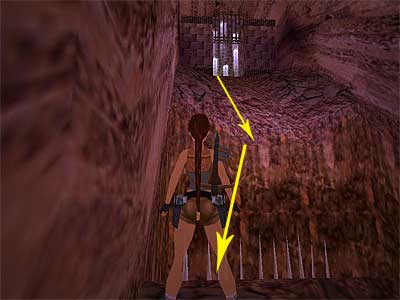
(Note - You may want to take a look at the Note about the giant red scorpions at the beginning of the Menkaure's Pyramid level.) Continue forwards down the slope, killing a bat en route. To get past the moving blade, stand close to it on the left or the right and go through when the blade swings to the other side. Do the same for the second moving blade and kill the two bats as soon as you enter the next room. Go down the stairs. Half way down, Lara will look at a Gold Star above her head. Equip the Revolver or the Crossbow combined with the LaserSight and shoot the star to open a trapdoor in the basin of the room at the bottom of the stairs. Continue down the stairs and you will see two mummies moving around in the basin. You can blow them up or totally avoid them, as they are too slow. Kill the bat that is triggered when you enter the room and pick up the Revolver ammo from the far left (southeast) corner. If you do not want to kill the mummies, and you cannot kill the annoying bat because Lara aims at the mummies, go up the stairs where the mummies will not follow you. To get into the basin, stand against it and keep pressing the Up direction key. Lara will keep running towards it, so press the Jump button to leap over the edge. Drop through the trapdoor you just opened and go down the ramp. Be careful of the pit because spikes pop out from the floor. Line Lara up to the rope and take a running jump to grab it. Slide to the bottom and start swinging. Jump to the opposite side and be on your guard for the two mummies lurking in the next room. You can blow them up, or totally avoid them, as they are too slow. Kill the bat that emerges from the left. Area with two pits and ropes - There are two spiked pits with ropes on the other side. First, go to the right pit. The ropes are lined up - the second is exactly behind the first one. So if you line Lara up to the first and you cannot see the second, you are in the perfect position. Take a running jump to grab the first rope and slide to the bottom. Swing towards the second rope and jump to grab it. Slide to the bottom, swing again, and jump to the opposite ledge. If you have maximum momentum and let Lara reach the highest point of her swing, it is possible to jump from the first rope directly to the ledge, bypassing the second rope. If you are willing to try this, however, note that you should not press Action whilst jumping from the first rope. Go up the ramp and throw the switch to open a trapdoor somewhere in the left pit. Swing back across the pit. Go to the left pit and repeat the same process described above for the second set of ropes. Again, you can bypass the second rope with the method described above. Go up the ramp and climb through the trapdoor you just opened. What you see in front you is a Guardian similar to the ones you saw at the end of Cleopatra's Palaces. He will start throwing golden bolts from the pole he holds, and they are very harmful. You can side jump to the left and right whilst simultaneously shooting at him, or simply crouch in front him and shoot using just the Pistols without getting damage at all. When you are done with him, use the Crowbar to pry the Western Shaft Key from the wall in the west. Alternative method - If you are up for a little challenge, ignore the Guardian. As soon as you climb up from the trapdoor, keep cool and make a series of running jumps towards the opposite wall. If you do not waste any time at all, you will hardly get hit by the bolts. Get the Western Shaft Key with your crowbar (press the Look button to break the camera), and roll and jump your way back down the trapdoor. If you are fast enough, you will only need one Medipack during the whole process. When Lara pick ups the Key, a cut scene shows a block lowering back in the room where the moving blades are, revealing a passage. Drop through the trapdoor and go down the ramp. Use the ropes to get to the other side, and head to the first pit with the single rope. Swing and jump to the opposite side, go up the ramp, and climb through the opening to get back inside the basin. Jump out of the basin and go up the stairs. The passage you revealed by getting the Key is on your right (east). Dark passage - Slide down the ramp. You may need to light a Flare here to see clearly. Two moving horizontal blades are triggered in the middle of the next hallway. Crawl to avoid them and run up the ramp. At the top, stand facing east and jump up, pressing Action as you do so to open the trapdoor. Climb up through it and draw your weapons. Two giant scorpions are coming from the south side. Take care of them, and just before the deep pit, go through the passage on the left (east) between the two pyramids. Step on the ledge of the left pyramid and push the button to open the top of the second pyramid. Another giant scorpion appears, so take care of it from here. Climbing up the pyramid - Approach the deep pit and turn left (east) to step on the first ledge of the pyramid. From here, climb to the second ledge and turn right (south). Take a running jump over the slope to land on the next flat ledge (you are still on the second level up from the ground). Turn left (east) and climb onto the third ledge, then to the fourth one a bit to the left. Step on the ledge to the left (north), then to the top. Turn around and drop backwards to grab the edge of the opening. Climb down the ladder. Inside the pyramid - Go up the ramp and take a running jump to clear the pit with the spikes that pop out from the floor. Jump up to grab the bars and monkey swing to the other side. To get past the spiked pit with the moving blade, walk to the edge of the pit on the left or the right side and tap back once. When you see the blade on your side, start running and perform a running jump to grab the opposite ledge of the pit. Pull up and continue to the right around the corner. Do the same for the next spiked pit and moving blade. Alternative way of crossing the pits - Notice the openings on the left and right sides of the pit, where the blades swing in and out? Well, stand to the left or right side of the edge and turn towards the respective opening. Wait for the blade to swing out of the opening and take a diagonal running jump to land in there. Now walk carefully to the edge of the opening and turn towards the opposite edge of the pit. For some strange reason, the blade cannot hurt you (on the PC version at least). Be careful though, because it may push you back and disorientate you a bit. Time your jump to avoid the blade and take a running jump towards the opposite side of the pit. Ignore the monkey bars on the left for now and get past the third spiked pit and moving blade. Around the corner on the left, you will find a chain. Pull it to open a gate. Return past the third spiked pit and moving blade, and use the bars on the right to monkey swing to the other side. Secret (1-1\ total: 66-70) - You may want to save your game before going through the gate, in case you do not make it the first time. Stand on the right hand side of the gate and slide down. Just before the edge of the spiked pit, jump to the right to land either on a triangular ledge above the pit, or inside the pit - in the far right corner, which is safe (see this screenshot). Pick up the Uzi (ammo if you already have it) from inside the pit and climb out. Continue sliding, eventually dropping through an opening. You are back Underneath The Sphinx where you began the level. If you take a look at the bottom of the hill (north) you will see the closed gate that leads to the room with the stone tablets. The gate does not open, though. Continue uphill (south) to return to the Sphinx Complex. Back to the Sphinx Complex - Climb out of the pit and head forwards. Turn right and approach the deep pit from the left hand side. Stand on the triangular ledge and take a running jump to the other side. Use the Guard's Key to open the door. Continue on into the dark cave to end the level.
|
||
| « Level 29: Menkaure's Pyramid | Index | Level 31: The Mastabas » |
| Copyright © www.tombraiderchronicles.com |
||