Tomb
Raider The Last Revelation Walkthrough and Game Guide
Featuring All Secrets and Hidden Rewards and packed with Screenshots
Level 11: Guardian of Semerkhet
|
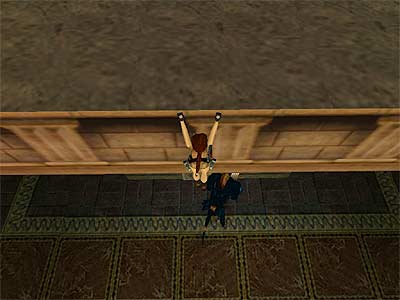
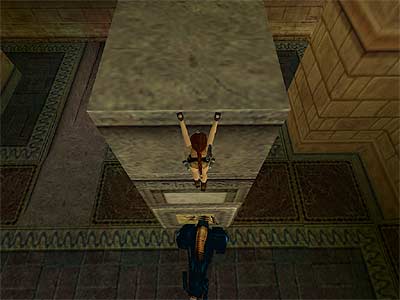
Drop through the hole in the floor and slide down the ramp. To get past the blade trap, stand in front of it as close as you can and when the blades are open press the Roll button. Press it only once. If you keep pressing it, Lara will roll twice and return back to the side of the blade you started off at! Follow the hallway until you reach a second blade trap. Pass through it as before and slide down the next ramp. Climb through the opening on the left wall and then crawl through the second one to reach the next room. Timed door\ passing the blades - In case you cannot see it, there is a door in the Northeast corner of the room. This door will open in its entirety by virtue of turning the wheel five times. Shortly after however it starts closing, and you will only have about 12 seconds to run around the ledges being careful to avoid the blade traps that quite literally pop out of nowhere (they kill you instantly). If you survive this you will then have to quickly crawl underneath the door before it closes. It is certainly not easy, but the difficult part is avoiding the blades, not getting round in the time you are given. A tip that will help you to pass the blades without injury is to not once stop for breath. If you keep running at all the time, they will not hurt you. So, turn the wheel five times and jump over it. Do not turn left in order to pass it because you will waste time. Follow the ledge and do not sprint, as there is no need to and you will not be able to turn right in an efficient manner. Keep running and jump to the second ledge, turning right in midair if this is possible. Do not stop and jump to the third ledge. Turn left, and if necessary crawl underneath the door that will soon close. Once you make it past, stop! Save your game and take a breath. Do not proceed onwards yet because there are more blades ahead and the door that is now closed behind you may prevent you from seeing what is going on next. The blades are in the middle of the ledge and right in front of you, so run to the end and jump to the left. Take the Golden Vraeus from the back of the pedestal so to avoid the small blades that pop out from it. Safely drop down and make your way back to the other side of the room, (South) jumping over the holes in the floor as you do so, because some of them contain blades that can kill you. Climb through the opening and then up the ladder. Crawl through the next opening and drop down at the end to reach the ledge where the wheel is. Return back to the room you were in before by virtue of following the crawlspace. Place the Vraeus in the receptacle on the south wall. The cut scene shows the mechanism opening a small pyramid on the map using a golden beam. Pick up the Guardian Key from the small pyramid and place it in the other receptacle to open the nearby trapdoor. Drop through it and slide down the ramp. Go to the right of the hallway (East) and head up to the raised floor. You can hear that something is trying to burst out through the barred doors. Pick up the Small Medipack and DON'T go to the left, or this thing will burst out from the barred door at the end (in some versions of the game, the door opens using the nearby lever). 1st Secret (1-3\ total: 38-70) - Grab the bars above and traverse towards the hallway you passed before. When you pass the opening you dropped through, two bats attack. Drop down, kill them, and return back to the raised floor. Grab the bars again and traverse until you reach an opening in the left-hand wall close to the end. Stand against it, release Action, and press it again to grab the edge. Pull up and crawl to the end to reach the Secret room. Safely drop onto the floor. Make sure you drop down off the ledge from the left or right side but not from the middle, or you will get burned by the flaming niches. Get the Shotgun Normal ammo and the Crossbow Explosive ammo from the top of the boxes. From the four flame niches, only the one on the west wall is accessible. Wait for the fire to go away, get the Shotgun Wideshot ammo, and jump backwards to avoid getting burned. Use the niche again to make the one on the east wall accessible. Take the Uzi ammo from the east niche and use it again to make the niche on the south wall accessible. Get the Large Medipack from the south niche but do not use the niche on the north wall because a mass of beetles will be released. Climb up the ladder and make your way back to the hallway. Releasing the bull - Follow the East Side of the hallway (where you got the Medipack) and approach the lever at the end. It is supposed that you need to pull the lever and open the doors, but the bull bursts out if you wait for a few seconds. Did you wonder what the thing behind the doors was? In the unlikely scenario that he does not come, use the lever. You cannot kill the bull, so do not waste time and ammo. Just watch out for when he attacks using his horns. This can rid you of a lot of your health. 2nd Secret (2-3\ total: 39-70) - Go though the door the bull came from (remember where the fire is on your right as you enter. You will need to make use of it soon). Sprint past the hallway at the end until you reach a small room. Pick up the Small Medipack in the middle of the floor and step on a ledge to be out of harm's reach from the bull. Kill the three bats that attacked you just before you came in the room. Use the niche to get a Torch and return back to the door you came through before. Light your Torch using the fire next to the door and return to the small room where you got the Torch. Light the two torches - one on each side of the room - to open the door. Get rid of the Torch. You will not need it anymore. Drop down to discover the Secret room. Follow the passageway to the end and get the Shotgun Normal ammo, the Crossbow Normal ammo and the Large Medipack from the pedestals, standing diagonally in front of the pedestals so to avoid the blades that pop out from them. When you get the Medipack, a ball with spikes drops down from the ceiling, so make sure you avoid it as best you can. Return back the same way you came. Challenging the bull to break the door - You need to go back down the hallway close to the slope where you first came into this area. It is one way, so you cannot really get lost. Just be careful not to be hit by the bull. When you reach the slope, run towards the barred door on the West Side of the hallway. You need to stand in front of it and challenge the bull into charging at you head on. Do not stand right at the back of the alcove or you will not have any room to jump out of the way. When you see him coming towards you and the distance between you and him is down to just a couple of yards, jump to the side (left or right). You may need a couple of tries to get this right, but eventually he will fly past where you were previously standing and break down the door. If you are low on health and the bull keeps hurting you, hang from the monkey bars. It will take more time, but he will eventually break the door. Room with three eye symbol tablets - Go through the door the bull smashed and sprint down the hallway to reach a big room. When you enter you should be able to see the eye symbol tablet ahead (West). There are two more alongside the entrance (East). Behind the single tablet are two doors. The left one is the exit and the right one leads you to some pickups and a Secret. The method to get out of this room is the same as the one that got you into it. Stand in front of each tablet and wait for the bull to charge at you. When he is within a couple of yards of making contact, jump to the side (left or right). Depending on which stone you make him break first, the doors open in a different order. There is a simple way however to get the Secret and the pickups present, and then leave courtesy of an easier way. To initiate this you should only get the left stone broken near the entrance (left as you face them). Upper part - As soon as you break the left stone, the right door on the West Side opens. Go through it and climb the ladder on the right to reach the upper part of the room. Follow the left hand side of the balcony and go up the ramp on the north side. Be careful of the ball with the spikes that drops down from the ceiling. Pick up the Small Medipack, the Uzi ammo, and the Shotgun Normal ammo from the ledge. 3rd Secret (3-3\ total: 40-70) - Exit and continue to the left to reach the other side of the balcony. Climb up through the opening in the ceiling on the south side to find the Secret room. You can see the Small and Large Medipacks, and the Shotgun Normal ammo on the pedestals. Decide which one you want because when you get one, the other two ignite. Be careful on your way out. A ball with spikes drops down from the ceiling right above the opening. Crawl backwards and hang from the edge in order to leave. Do not go down yet. You need to break two more tablets and you can do it from here. One is the loner tablet on the West Side and the other is the right hand one to the east. To break the one in the west, go around the perimeter of the balcony and hang from the edge directly above it. It will not be spot-on underneath, but this does not prevent the bull from noticing you. So, hang from the edge and wait for him to attack. If he goes to the right or left of the stone, or you cannot see him, just pull up, take a couple of steps left or right, and try hanging from a different spot mere fractions away. Eventually he will break the stone (as shown in this screenshot). For the tablet that is left near the door you first came in, go around the perimeter of the balcony and jump onto the pillar where the tablet is. Follow the above method to have it broken (as shown here). When you are done, the left-hand door on the West Side will open. Drop down and go through it. Follow the hallway to the end and climb up the ladder to end the level.
|
||
| « Level 10: Tomb of Semerkhet | Index | Level 12: Desert Railroad » |
| Copyright © www.tombraiderchronicles.com |
||