First note
This skip can be performed either before getting the first Secret (if you do not want it) or afterwards. You will skip the part inside the opposite building and the retrieval of the Flue Room Key, the part of going to the back-side of the building, and the repeated back-tracking from the top of the area to the alley at the bottom and vise-versa. You will miss the 2nd Secret of the level, some kills and pick-ups.
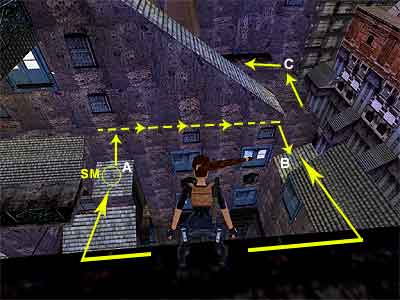 |
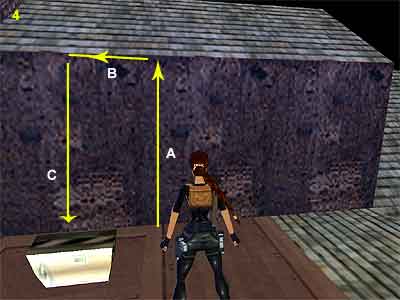
From the starting position, turn left and take a look below at the opposite buliding. Notice the Small Medi Pack on a slope (spot A). You can take a running jump to this slope (losing 50% of your health), grab the crevice above, traverse to the right and drop to the ledge at the end (spot B). Or, you can take a running jump derictly to spot B. Then climb on the ledge above, vault onto the slope (spot C) and go to the left. Here you will find a passage on the right hand side, which leads to a covered button, a Large Medi Pack and a crow you need to kill. Although you can press the button that raises the scaffolding (even if it is covered), there is no reason to do that, since you do not have the Flue Room Key, and moremover you do not need to go there at all. So, from spot C, ignore the passage on the right hand side and climb on the ledge that leads to an opening in the floor. |
 |
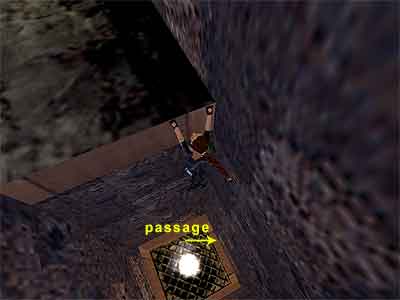 |
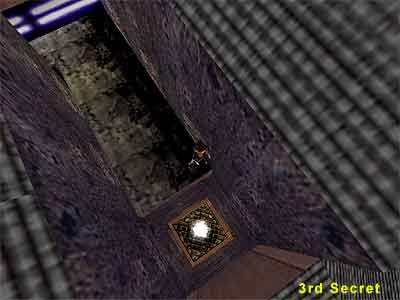
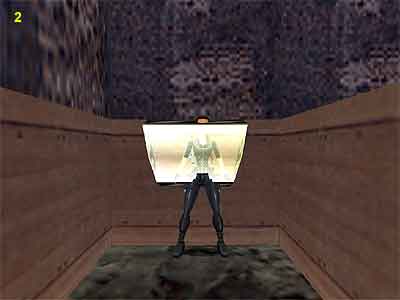
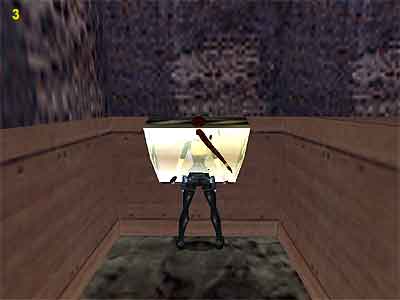
Since you have not been in the Flue Room, you should see a burner at the bottom of the opening. Before dropping down, you may want to get the 3rd Secret as described in the walkthrough. To get passed the burner below, stand having the opening to the back of you (left hand pic) and drop backwards to grab the edge (right hand pic). Shimmy to the very right and drop down to land just next to the fire. Lara may start losing health, but she will not get burned. Quickly turn right and go through the passage. Now pick up the walkthrough at Getting inside the Industrial. |
|
Second note
This note refers to those who have got the Flue Room Key, but have not uncovered the button that raises the scaffolding. If you are at the top and are not willing to go down, press the button at the back of buliding in order to uncover the button and return back up, follow the above procedure to reach the part where the covered button is. Here you have two options:
1. Ignore the covered button and go directly to the opening above the burner. Refer above on how you can get past it.
2. Do a little trick as decribed below in order to press the button.
 |
 |
 |
 |
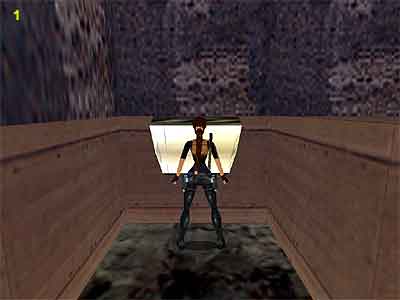
Stand in front of the cover (1) and press the Roll button. Lara will roll and find herself inside the cover (2). Carefully turn around (3) and press the button. Or, climb on the block on the right of the button (4) and turn left to face the slanted roof. Jump up and grab the edge of the roof (A). Traverse to the left (B) and stop when you are over the glass-covered button. Release and Lara will land in front of the button, somehow behind the glass (C). Press Action and Lara will press the button behind the glass. Then get back to jump to the scaffolding and get in the Flue Room to press the button that turns off the burner. |
|
Third note
Here you can completely skip the first tank area and most important the electrical machine area. You will not backtrack at all and you will go through the second tank in order to access the third one. Bear in mind that you will miss many pick-ups and kills. After entering the Industrial for the first time and killing the first guard, throw the switch to fill the first two tanks. Now go to the button on the right (as you face the switch). Stand in front of it, sticking to the glass. Roll on the spot and you will see Lara behind the glass (as decribed above). Turn around and press the button to fill the third tank.
Run down the passage (you will need to kill the second guard now, as he is triggered by Lara pressing that button). Bypass completely the first tank and dive directly in the second. Swim to the left and get out of the water. Follow the passage that leads to the third tank. Dive in and get out on the left hand side. Kill the guard and press the button to drain the water outside, open the hatch at the bottom and uncover the last button. Use the grates to traverse to the ledge with the two rats. Kill them and get the pick-ups if you want. Follow the passage and drop into the second tank. Climb out of the water and head back where you entered the industrial. Use the same method as before to push the button and fill the third tank with water. Go to the there and swim through the hatch.
Also see: Quick end of the level
Copyright © www.tombraiderchronicles.com
No reproduction, in full or in part, without permission.