 |
 |
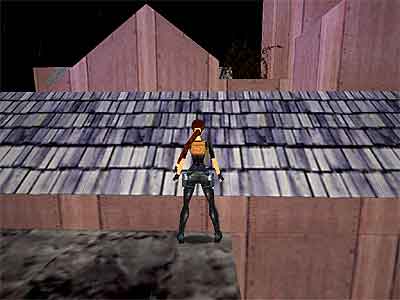
From the starting position, turn around and walk to the end of the ledge. Turn left to face the sloped roof. That way, you will have the metal bridge to your back. Stand against the roof. |
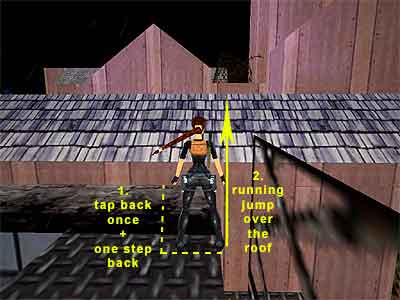
Tap back once, take one step backwards and take a running jump over the roof to land in an alley. |
 |
 |
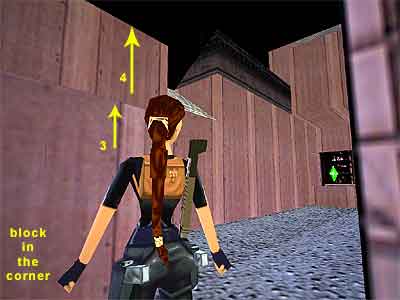
Go to the end around to the right to get the Crystal and the Shotgun Shells. Back track and climb on the block in the corner (3), then ono the upper ledge that overlooks the crane (4). |
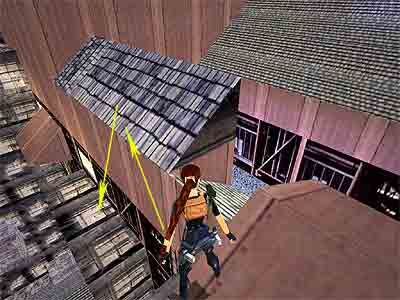
Facing the crane, drop off the ledge and onto the block on the right (5). Jump to the next lower ledge (6) and walk to the end (7). |
 |
 |
If you cannot drop on the ledge, as the 5th step shows in the previous screenshot, and you keep falling to your death, do this: Take a running jump to the gray roof on the right hand side, shimmy left if necessary, and drop to the lower ledge, as the 6th step shows. |
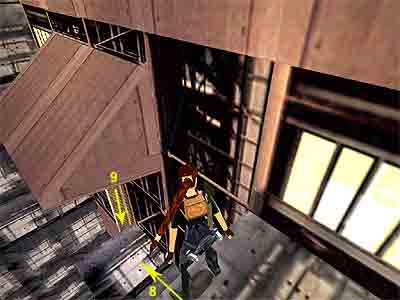
Safely drop to the ledge below (8), walk to the end and drop to the ledge at the bottom of the grating. Or, take a diagonal standing jump to grab the grating and climb to the bottom. |
 |
Facing the grating (and not as the screenshot shows), drop backwards onto the block (10). Turn around and notice the opening in the sloped roof. From the back of the block, take a standing jump to the opening without pressing Action (11). Walk through the barbwires and go through the passage. Kill the two rats and pick up the Rocket and the Small Medi Pack. |
| Your way back |
Copyright © www.tombraiderchronicles.com
No reproduction, in full or in part, without permission.